Photoshop Tutorial: Tilt-Shift
Alas, we’ve arrived at the last stop in our journey through some of the most common creative photo editing techniques. I hope you’ve enjoyed the ride where we explored everything from Antiquing to imitating the Holga and Lomo cameras of old, and that these posts have helped you add some new and fun tools to your repertoire! Today’s final process is one that is truly unique and specialized and, while you probably won’t use it as often as the others, it always yields truly fascinating results! May I introduce tilt-shift photography:
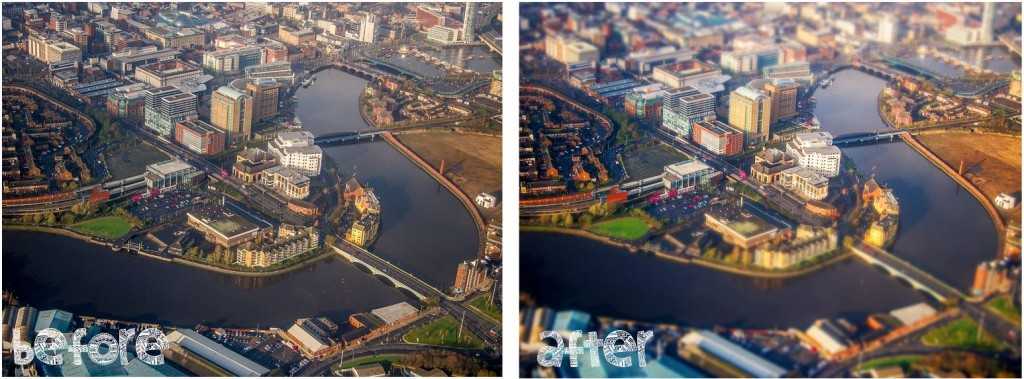
This camera technique is quite a complex one that typically requires expensive lenses and mastering a certain movement pattern while shooting. Employing both a tilt of the lens in relation to the object, and a shift of the lens across the object, the tilt-shift method creates an image that has a very shallow depth of field (very little is in sharp focus) and gives the appearance of miniature – like the scene was shot inside a doll house or model town set. When employed correctly, this process can give a fun and whimsical feel to your photos.
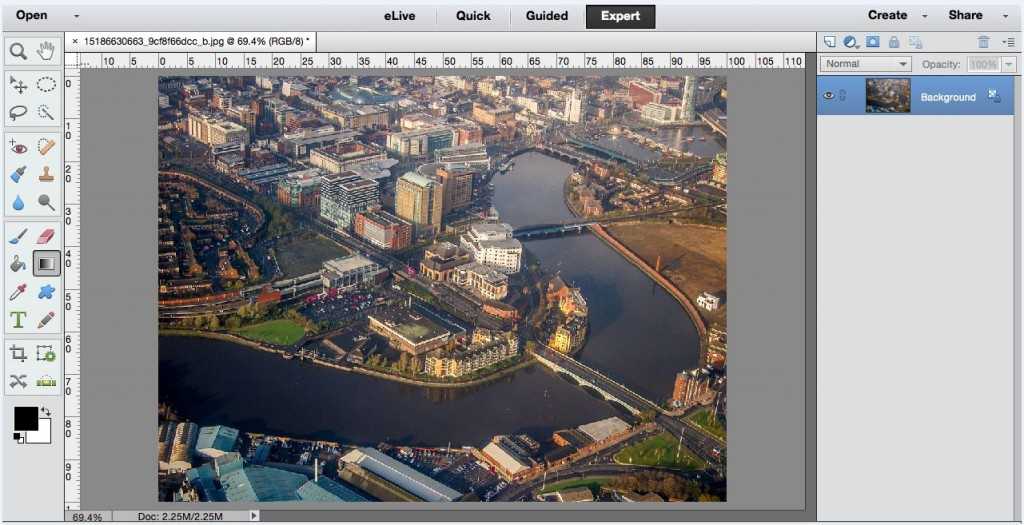
The first and, arguably, most important step is to choose a good base image. A high point of view, lots of details, and wide range of colors are all components you should look for. Remember, the final result will look like something a person made in miniature, so choose a scene that will work well like a town, skyline, house interior from above…you get the idea. Unfortunately, I could not find any suitable image in my personal portfolio, so I borrowed one via creative commons from Flickr user David Blaikie.
As you can see, it’s shot from above, has lots of detail and a variety of colors. I think it will work well for our “faux” tilt-shift!
So the first step, as always, is to open your base image in Photoshop. From there, it’s only five easy steps:
- Create a duplicate layer by using the shortcut Command + J.
- Apply a heavy blur to this layer. Go to Filter > Blur > Gaussian Blur. Each image will be different: I only needed a level of 3 to achieve my desired effect (you may need more or less). Just remember you want a good blur, but should still be able to recognize the objects.
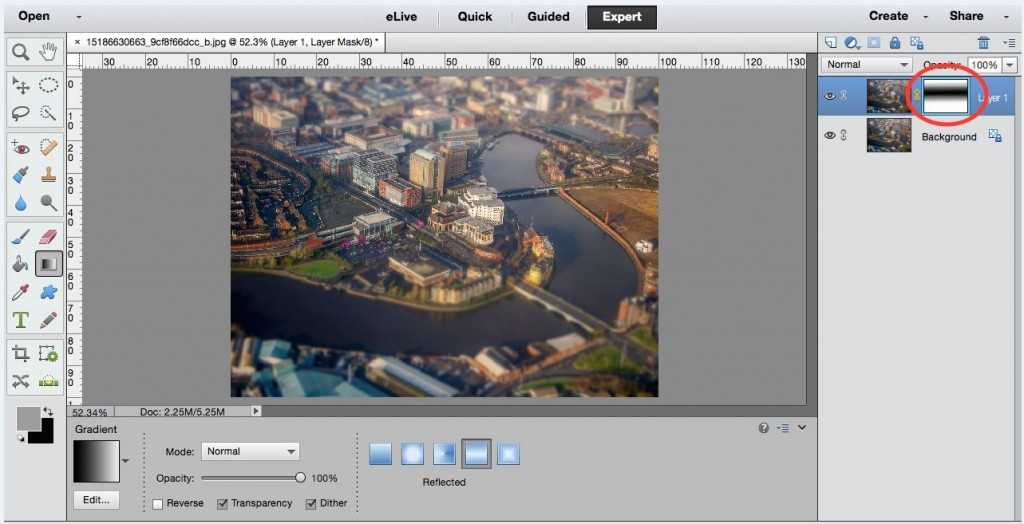
- Create a layer mask. In your layers sidebar, click on the icon for layer mask (it looks like a rectangle with a circle cut out of the middle). This should add to your new blurred layer.
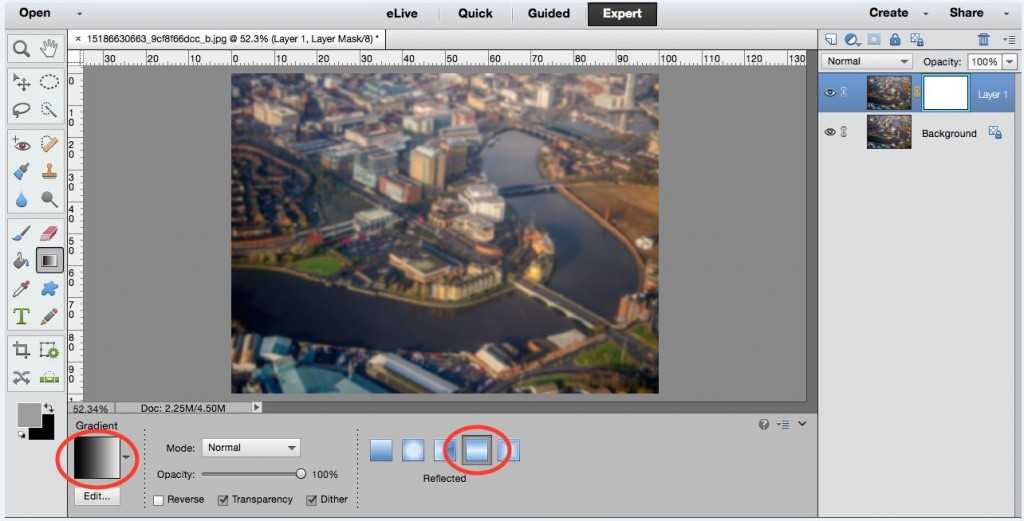
- Insert a gradient: With your layer mask selected, go to your main tool sidebar and choose the Gradient tool. Select the black-to-white pattern and the Reflected distribution.
Your cursor should now be a “crosshair” type shape. Click and drag starting from the point where you want to the sharpest focus vertically a little ways until you see a horizontal swath of sharpening. This is the step that takes some playing around! Depending on the direction and length of your gradient line, different areas of your image will be sharpened (or technically, the blur layer will be scrubbed away). I drew a short line starting from the very center of my image to about the 2/3 down mark. This created a relatively wide horizontal gradient:
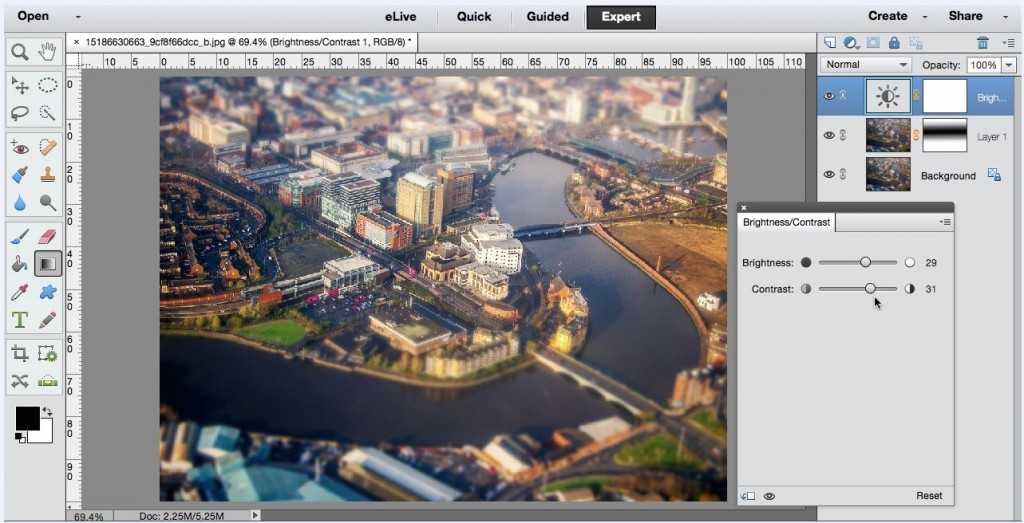
- Tweak your Brightness and Contrast
Create a new adjustment layer by clicking on the icon in your layers sidebar (this one looks like a circle that is half light half dark). Choose the Brightness/Contrast option and play with the slider bars until it looks slightly surreal. I increased both by around +30, but yours will likely be different.
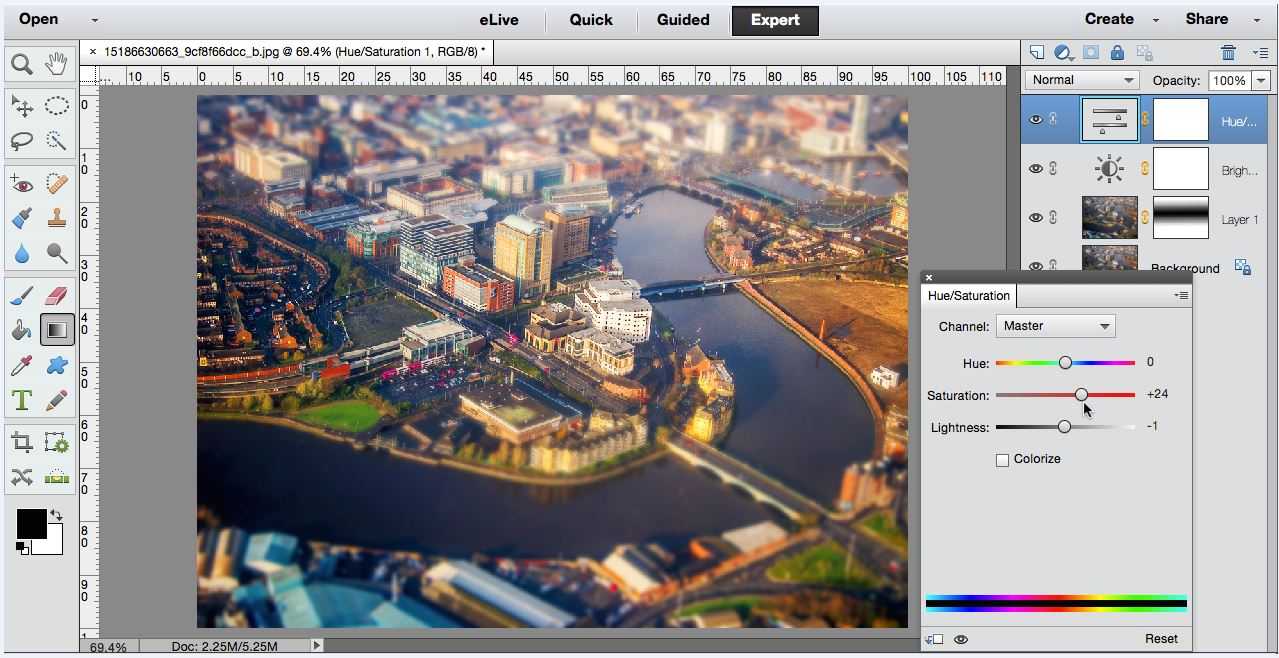
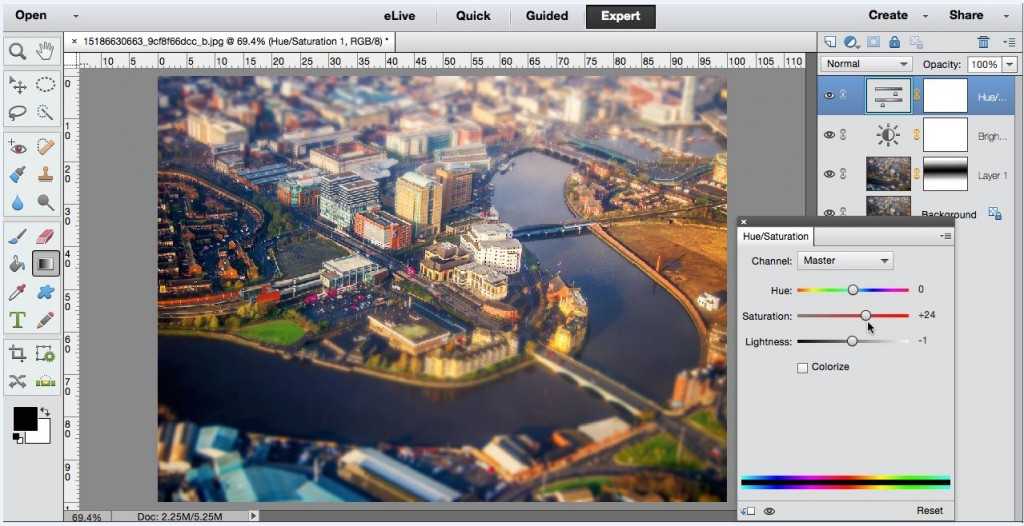
- Boost your Saturation
One of the things that gives tilt-shift photography its “mini-scene” quality is the oversaturation. You want your colors to look like paint rather than the washed out hues of reality. So once again, choose the new adjustment layer icon and go to Hue/Saturation. Move your slider bar up until the colors look a bit fake, and you may or may not need to change your Lightness setting.
- Save both a layered .psd copy and a flattened .jpg copy (this should be second nature by now).
And you’re all done!
Upon first glance, your image should look unreal and upon further inspection, it should look like it is in fact a miniature scene that’s been crafted in a workshop somewhere. Or a tiny movie set. Or a house for a mouse. The idea remains the same, but the possibilities are endless. Once you feel comfortable with this technique, give it a try on things like interior rooms (kitchens and bathrooms especially), roadways, and even your pets! You can apply the tilt-shift technique to more than you can imagine!

