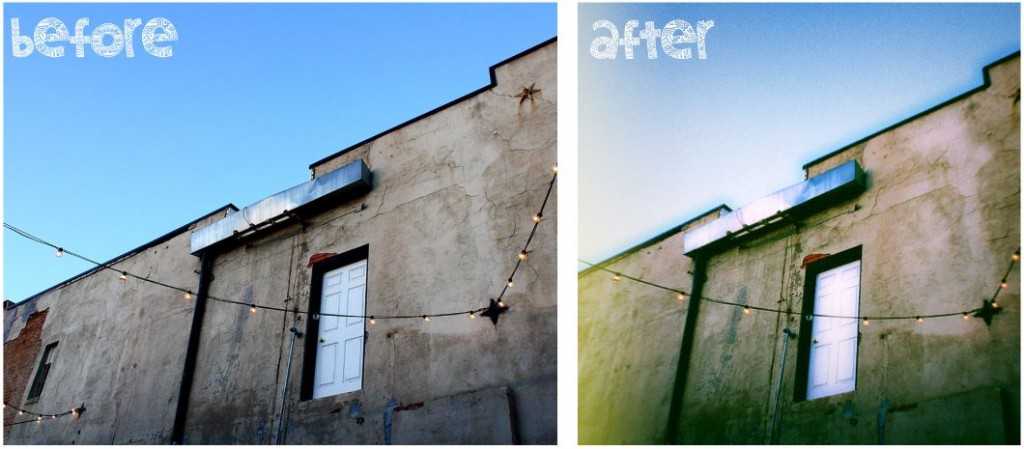
In this next edition of our creative editing series, we’re going to conquer a much more extreme, and much more challenging effect: the Holga. The Holga is a vintage camera, created in Hong Kong in 1982, which produces unique and surreal style images with heavy vignette, blur, grain, and light leaks. All these so-called “defects” combine to create a truly interesting and sometimes bizarre final product, and while you may not desire this look in your everyday photos, the Holga effect is fun to use for more “artsy” applications like large prints/murals, canvas wraps, or homemade greeting cards.
Since this is a toughie, I won’t waste much time on words, but instead get right to it! And don’t be scared away – there may be many steps and many layers, but none of them take very long. No darkroom needed.
Okay, as usual, open your base image. Still-life and architecture photos work best.
- Crop your photo into a square.
- Add blur
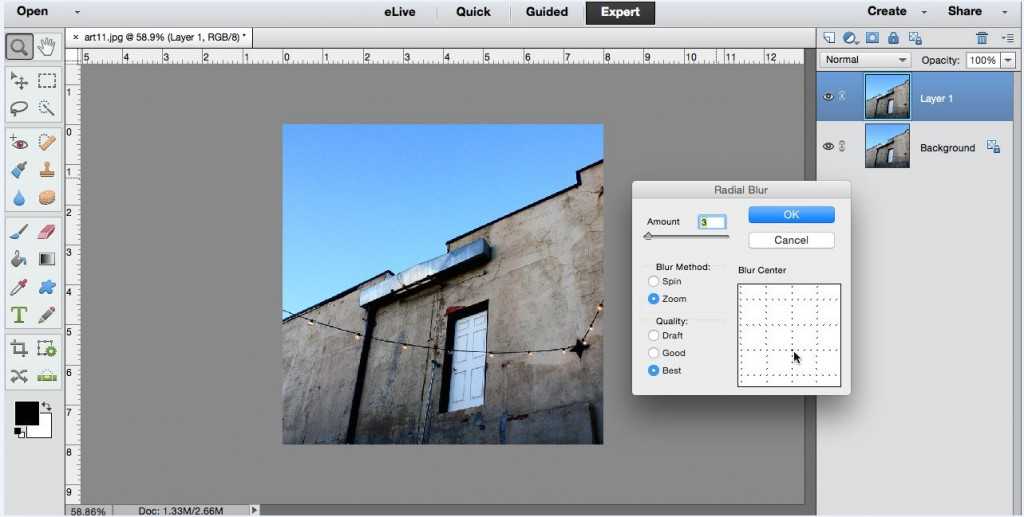
Create a duplicate layer (Command +J on Mac). Go to Filter > Blur > Radial Blur. Set your options as follows: Amount = 3, Blur Method = Zoom, Quality = Best. Move the center point to correspond with the main object in your image.
- Add a Diffuse Glow
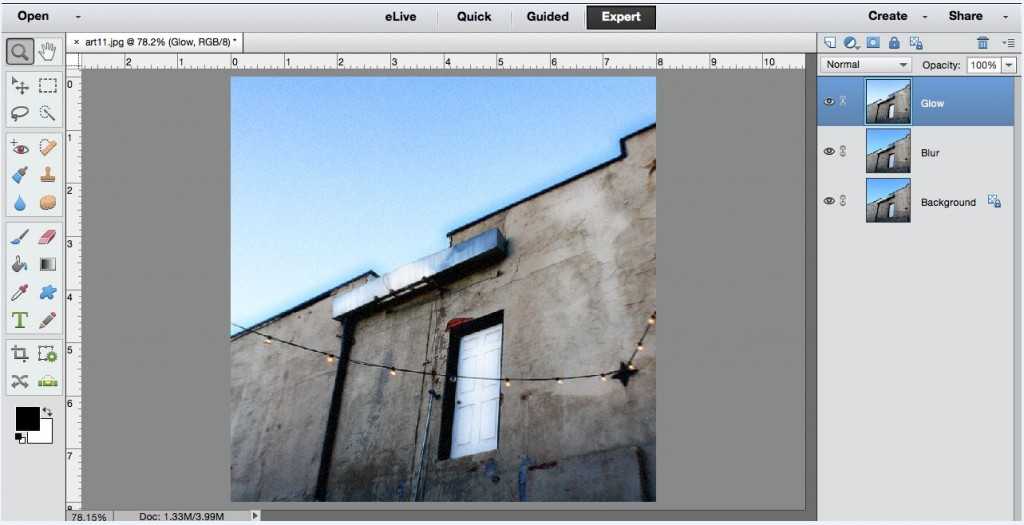
Duplicate your blur layer (Layer > Duplicate Layer) and add a diffuse glow filter (Filter > Distort > Diffuse Glow). Set your options as follows: Grain = 4, Glow = 4, Clear Amount = 18. You may also want to start naming your layers here, as it is easier to go back and reference as your editing continues.
This should also add grain to your image, but if you feel it needs more, you can create a separate grain layer: New Layer > Filter > Noise > Add Noise
- Create a Vignette
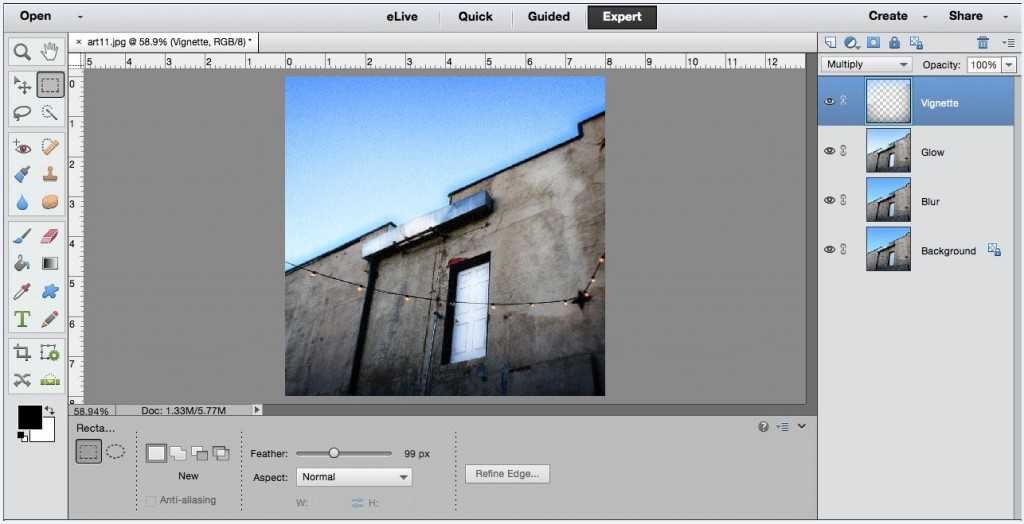
Choose the Rectangular Marquee tool and set the Feather to 100 px (more or less depending on the resolution of your image). Drag your mouse to select the middle portion of your image, leaving a “border” of sorts. Now select the inverse (Select > Inverse) and go to Edit > Copy Merged. This will place your selection on the clipboard.
Go to Edit > Paste. This creates a new layer of your marquee selection. Change your blending mode to “multiply” and adjust your opacity until you get a nice dark vignette!
- Make your colors strange
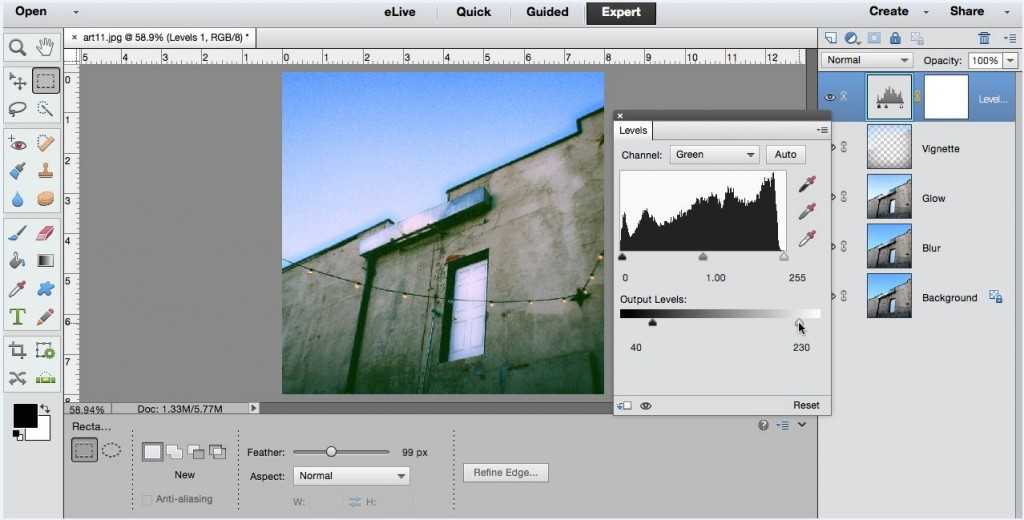
Create a new adjustment layer for levels (Layer > New Adjustment Layer > Levels). Go to your Green channel and move your Output Levels sliders to 40 and 230. This will dull your highlights and lowlights while adding a green colorcast.
Go to your Red channel and just move the middle gamma slider to 1.10.
Next, go to the full mixed (RGB) channel. Pull your black Output Levels slider to 20 and your white Output Levels to 230.
- Boost your Saturation and Contrast
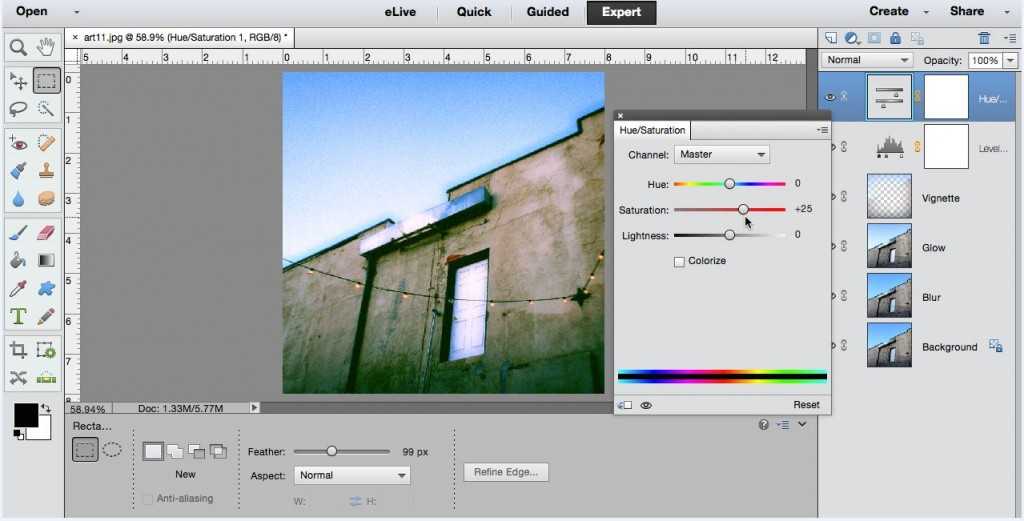
Create a new adjustment layer for Saturation (Layer > New Adjustment Layer > Hue/Saturation) and boost your slider +25. Keep in mind, this is just a starting point, so play around and choose what works best for your image!
Now, make a new adjustment layer for Brightness/Contrast. Increase your Contrast to +30 or wherever you feel looks best. Remember though – the Holga makes extreme and surreal images, so don’t be too light-handed!
- Create a Pinhole effect
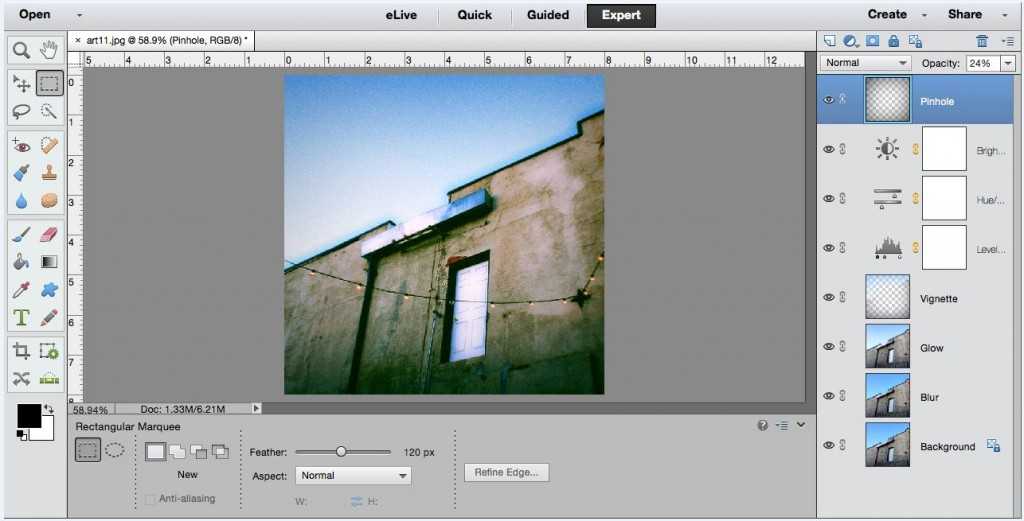
Bring up a new layer (Command +N on Mac) and get ready to use your Rectangular Marquee again. Set your feathering to just slightly more than you did previously (I chose around 125px) and make another selection like you did for the vignette. Again, select the inverse.
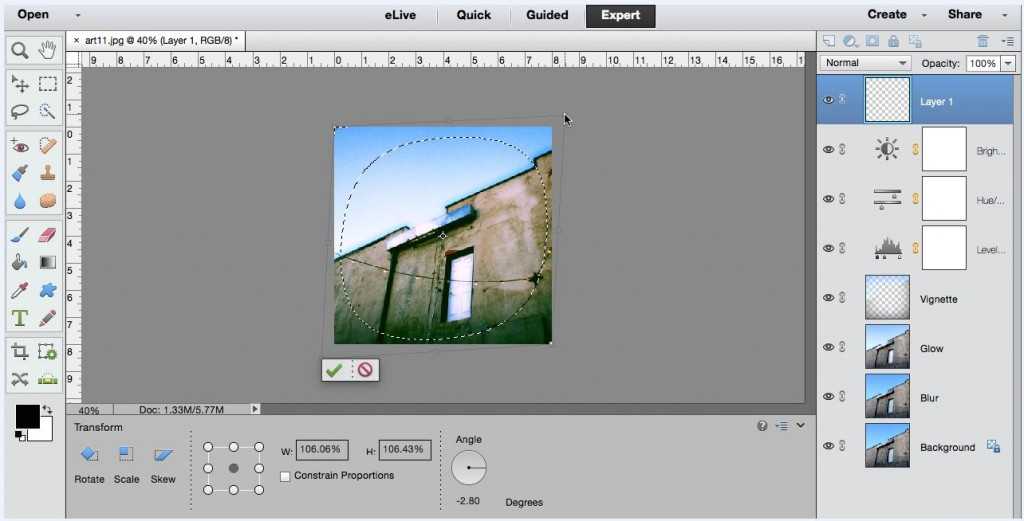
Most Holgas did not make uniformly dark edges, but instead they are somewhat oblong. So to mimic this, go to Select > Transform Selection. This should bring up a box around your image. Start at the bottom left corner of your image and while holding down the Command button, pull the corner slightly until your rectangle appears to bulge and is uneven. Repeat with the upper right corner.
Now go to Edit > Fill Layer and select Black and a blending mode of normal. This will make your image edges (in the selection) quite dark. Use the Opacity slider to find an amount you’re comfortable with (it was around 24% for me).
- Add a Light Leak
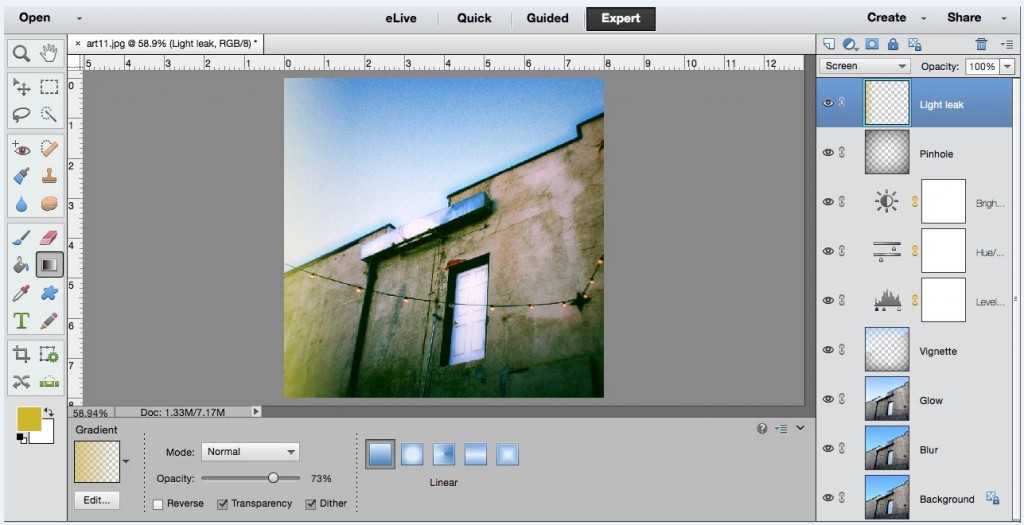
To imitate the streaks of light that often leaked onto the film of cheap plastic cameras like the Holga, we will start with a new empty layer (Command + N) and set the blending mode to Screen.
Choose a color in your “foreground” color picker. Yellows, golds, and pinks are most authentic. Choose the Gradient tool from the side palette, and set it to blend Foreground to Transparent.
Now simply click and drag your mouse from any edge of your image towards the middle. This takes a bit of practice to get the look you’re going for. I just chose a very easy golden-colored straight side leak by pulling my mouse right across the left hand ¼ of my image, but you can make a light leak from any edge or corner!
You may be looking at your image now and saying, “boy, this sure looks crazy”. That’s when you know you’ve done it right! The Holga effect is one that is out of this world and is extremely fun to experiment with!
Come back next time to learn another creative photo editing effect!


