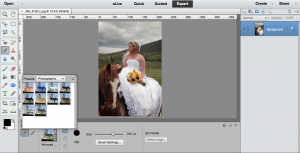
Photoshop Tutorial: Decoding the Selection Brush
We’ve conquered the Magic Wand. We’ve lassoed the Lasso. Now it’s time to continue on our journey and unearth another of the Photoshop selection tools! This week we will discuss the Selection Brush, a classic choice in the arsenal, and give you the tips you need to use it effectively.
But first, let’s recap why we may need these tools in the first place. If you need to cut out an object, or modify only part of an image, then the selection tools are just the ticket. This is one of the most common editing actions, so it’s important to know which individual tool is best for your needs. Whether you want to change the color of someone’s shirt or move a flowerpot to the other edge of the frame, selection tools are crucial in getting the job done!
So, what makes the Selection Brush different? Well, this is the one and only tool that gives the user (that’s you!) complete freedom. The program doesn’t anticipate edges, or look for colors…it simply selects exactly where you tell it to. And for this reason, it’s hands down the most versatile of the selection tool set. This is also the device to use for touching up after you’ve implemented one of the others, such as the Magic Wand. The fine control of the brush allows you to capture the exact object you want, down to the very last pixel!
Let’s open up a sample image just like we did in our previous tutorials, a black to white gradient with a color cutout in the middle:

Okay, to find the Selection Brush, go to your side toolbar, under the group called Select, and it should be on the bottom right corner. There are three tools embedded here: Quick Selection, Magic Wand, and the Selection Brush. You’ll know when you’ve found the brush when your bottom bar looks like this:

From here, there are several ways to customize your Selection Brush:
- Using a default brush from the dropdown menu (these are great if you need to have consistency across a group of images and don’t want to memorize the size and hardness settings)
- Using the Size slider bar (this simply makes your brush…you guessed it…bigger or smaller)
- Using the Hardness slider bar (this will give your brush fuzzy/blurred edges towards the low end or crisp/clear edges towards the high end)
In order to show just how much control you have with the Selection Brush, I drew a ridiculous smiley face right in the middle of my image. The brush doesn’t care if there’s a blue object or a gradient; the brush only cares about my mouse strokes. For simplicity, I used a size of 100px and a hardness of 50%:
This brush is especially useful when you want to make one selection with multiple non-touching sites. Like with my smiley face, there are three different spots (two eyes, one mouth), but they are combined into one selection. This typically isn’t possible with tools like the Magic Wand, Marquee, or Lasso.
If you need to use the brush to do detailed edge work, be sure to increase your hardness to 100% for super clean lines and adjust your size towards the smaller end, depending on the size of your image, for finer control.
Now, I’m sure you’re wondering about that extra dropdown menu in the bottom bar, the one that currently says Selection. This is where things just start to get fun!
There are two options under this menu:
- Selection – this keeps your brush as is (meaning there are no extra layers in the image and you are selecting exactly the parts of the image you want).
- Mask – this adds an “invisible layer” to your image (which won’t show up on the right hand layers toolbar). This layer is permeable (which means you make your brush selections “through” the layer).
Let’s look at this with a mask at 50% overlay (aka opacity) in a yellow color. Using the Add function, I drew a simple zigzag across my image here:
You see, the yellow mask is on top of my original image and wherever my brush hits, it “wipes away” the mask to reveal what’s underneath. Now, let’s do the same thing with the Subtract function:
Now it appears that the yellow mask layer is behind the original, creating the mirror effect of the previous example. Remember, you can still adjust the size and hardness of your brush here, as well as the color and opacity of the mask.
Generally, the mask option is used more in the creation of logos, graphics, or really complex layered images (for advertising purposes). For the majority of you, sticking to the straightforward Selection option is the way to go. So, just for fun, let’s take the last image and switch it from mask back to Selection mode:
From here, I picked up and moved my selection, setting it off to the side so you can see what is left of my image after doing so:
Kind of silly, but you get the idea! Don’t forget you can choose to select the inverse of your brush strokes (top menu bar > Select > Inverse) to make a selection out of everything but where you moused over.
Overall, the Selection Brush tool is one of the most useful in the entire Photoshop kit, and can help you in creating everything from precise alterations to unique freehand graphics. If you harness it just right and are confident with your mouse, I promise that it will become one of your favorite photo editing tools.
Stay tuned for next time when we explore the Quick Selection feature!
Happy editing!

