The summer is quickly upon us, which means that picture-snapping season is here! Everyone from seasoned professional photographers to family novices will be out in the sunshine, capturing the smiles of clients and friends as the scenery turns green.
The tricky thing is, portraits are often difficult to get just right, even for the pros. Dozens of elements must come together to create a flattering image; light strength and angle, white balance, background colors, and shutter speed just to name a few! Luckily we have some powerful editing tools at our fingertips with Adobe Photoshop, and they can turn even a dismal portrait into a print-worthy one.
There are several portrait-specific editing programs on the market now, but not only are they generally expensive, they can often produce unrealistic looking results. And nobody wants to look fake or plastic in their final headshot!
Just using Photoshop Elements, you can touch up and refine a mediocre image to look clean and fresh without the Barbie treatment. Here are 2 Photoshop Tools To Save Your Portraits and the most useful basic tools to have in your arsenal when tackling all those family reunion shots this summer:
- Spot healing brush
This is hands-down my favorite tool to use, because it’s so simple and straightforward. You can get instant results and can make good headway in a short amount of time. I always start my retouching process with the spot healing brush!
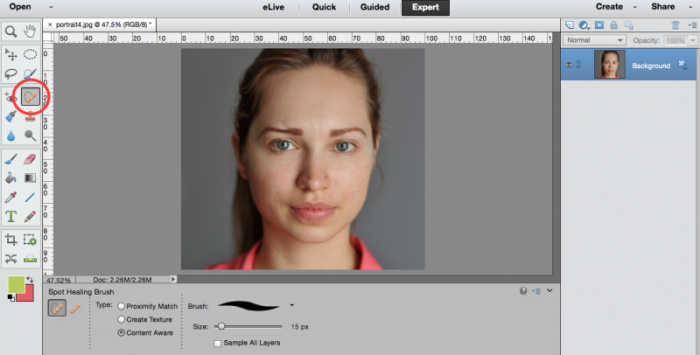
To protect the privacy of my clients, I am simply using a stock image found online for the purposes of this tutorial. So let’s open this in PSE13, and open up the spot healing brush in the third grouping of tools on the left hand sidebar.
In the bottom bar, make sure you have the “spot healing brush” selected, and not the “healing brush”. Also, choose the “content aware” type, as this is the smartest way to achieve natural looking results on skin. I’ve gone with a middle-of-the-road brush here, not too sharp and not too blurred, which is good for a first edit to bump out the obvious flaws. If you want to go over your image again, switch to the airbrush for fine-tuning.
Once you’ve got your settings in place, simply hover over the blemish you’d like to correct and click. Make sure to adjust the size of your mouse icon so that it completely covers the blemish, but doesn’t go too far beyond that.
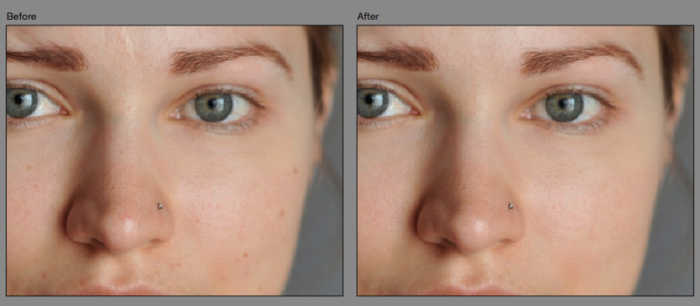
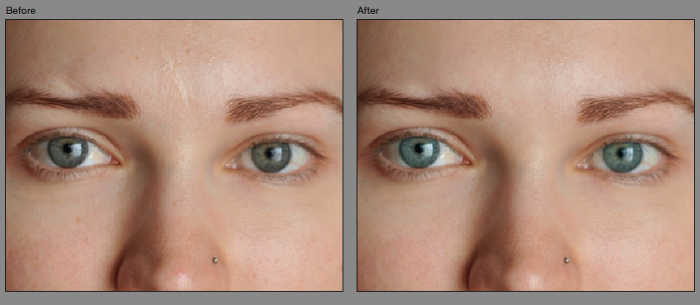
I used the spot healing brush here to cover a few red marks, freckles, and the scars on her forehead. It only took me about two minutes to achieve this:
As you can see, there’s a reason why this is my favorite tool! The results are natural and flattering. You can use this brush to soften everything from acne, wrinkles, dark under eye circles, and even the occasional stray hair.
Now let’s move to the next step!
- Smart brush
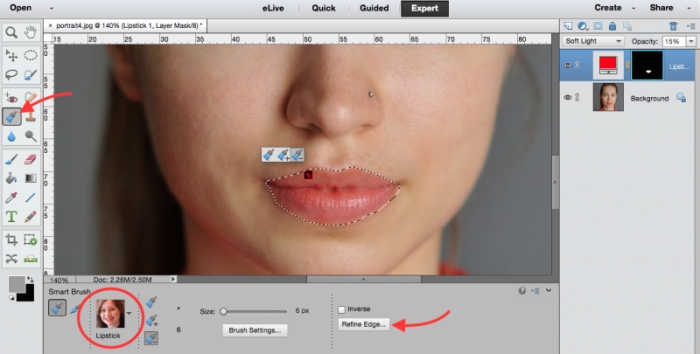
There are loads of options under the smart brush umbrella, but I want you to find the preset menu called “portrait” for this first purpose. Depending on your image, you may want to do things like lighten skin tones, brighten eyes, or whiten teeth and there are tools for that here.
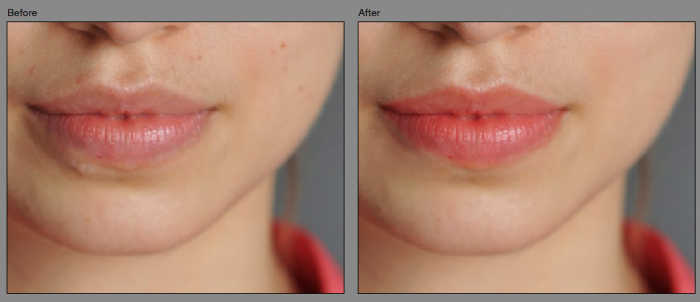
For my image, I’ll demonstrate how to redden the lips and alter the eye color. Let’s first start with the lips and choose the option that says “make lips red” upon hover.
Using your mouse, outline the lips until you get a decent fill (this brush automatically recognizes boundaries), toggling between the add and subtract selection buttons until you are moderately satisfied. Then use the “refine edge” button to soften the edges and feather them to look natural.
Lastly, head over to your layers on the right hand side and adjust the opacity of this new adjustment layer until you find the amount of redness or “lipstick” that you like. Easy!
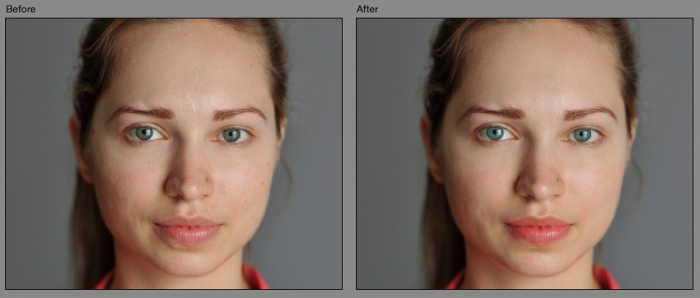
Here’s a look at our edits so far:
Usually I would proceed to use the “brighten eyes” feature, but due to the lighting here I don’t feel that’s necessary. So just for fun, I’ll show you how to change or enhance the eye color.
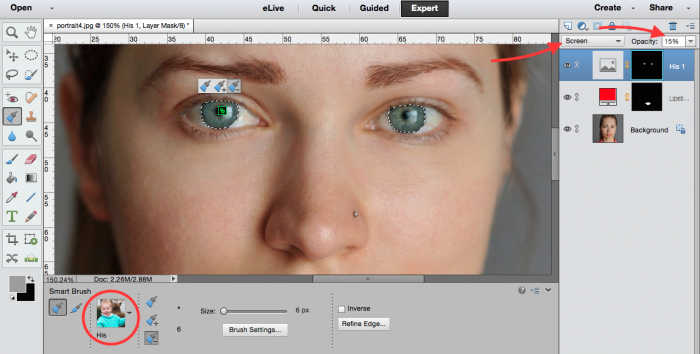
We’ll exit the portrait presets for this and instead choose the “color” preset menu. From there, choose your desired color- for this case, I’ll choose baby blue to simply boost the blue hues in her naturally occurring eye color.
Just like with the lips, use your mouse to select each eye and use the refine selection menu to utilize the smart radius and soften tools. Especially if you are making a drastic color change, your margins need to be super clean! I have found the most nice and natural results with using the “screen” blending mode, and an opacity between 10-20%, but experiment to find what looks the best for your unique image.
Here’s another look at our changes so far:
Pretty awesome for just a few tools and a few minutes, right?
If you zoom out and your changes look too strange or unnatural, select each layer and play with opacity or start over with a different color.
Then once you’re satisfied with your changes, as always, save your work! Then flatten your image and save again in the file extension of your choice.
Touching up your portraits doesn’t have to be a long or extensive process, or something that only a professional can do. With these two tools, you can brighten and freshen up your images in a matter of minutes, with natural and flattering results.
So get out there and start shooting! If you’d like to master the art of digital photography, check out our current digital photography class offerings. If you are more interested in image re-touching using Photoshop, we have many Adobe Photoshop classes coming up soon as well!
OR
Fill out the form below to tell us more about how we can help you get started! You can also call our office at 970-980-8091

