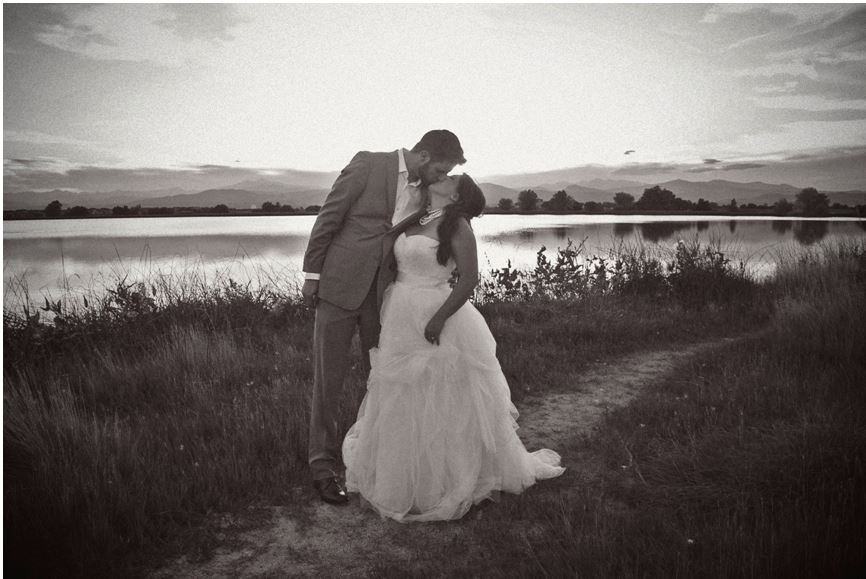
Images of a bygone era will always hold an appeal for us. Their romantic simplicity is intriguing and, lucky for us, recreating that vintage look is easy with our modern editing programs. Re-making your photos in old-timey monochrome is a wonderful way to add interest while paying homage to the past. This technique works well with almost any subject matter; from portraits to architecture, the vintage black and white is a classic choice!
I’ll show you just a handful of easy steps in Photoshop Elements to give your images this unique makeover. I chose to use one of my favorite photos from a wedding I recently shot. Please note that the “before” image was previously edited for basic things like color and contrast and I recommend you do those edits (and saving your image) prior to starting this creative treatment!
So, let’s open up the starting image in Photoshop, and I’ll walk you through the rest one step at a time.
- Return your colors to the default settings. You can do this by pressing “D”. You should see your color blocks (background and foreground) return to this:
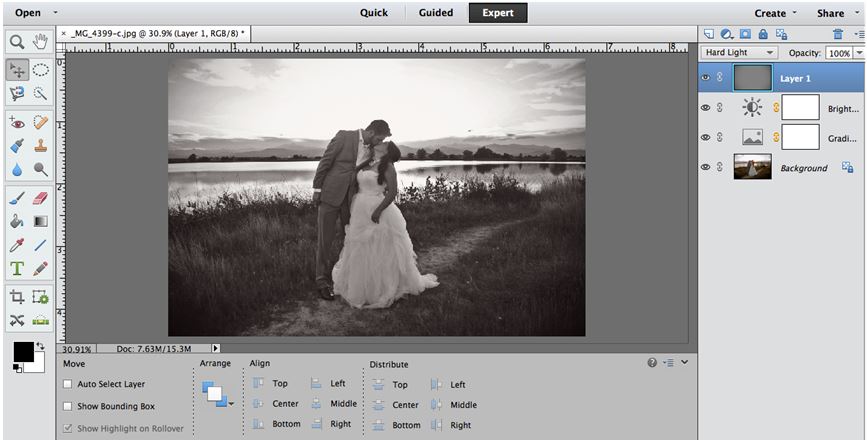
- Create a Gradient Map layer (this is different from a Gradient Fill layer) by going to Layer > New Adjustment Layer > Gradient Map.
You should see your photo instantly turn black and white. If not, check that you reset your color defaults correctly.
If your photo looks a bit too light or too dark to you, you can adjust what is called the “color midpoint”. Double click on your gradient bar, which will open a new window. Click on the far left color stop and that should bring up a tiny diamond slider along the bottom edge of your gradient. Pulling this to the right or left shifts the color midpoint, making your image overall darker or lighter, respectively. Settle on a point that you feel works for your image.
- Add a color tint to your photo.
For this tutorial, I chose to make a more sepia-toned photo, since this is characteristic of many vintage photos and I personally think the warmer tones are more flattering. But you can play around with other palettes and pick one you like the best. You can simply re-tone your black and white or go with something like a deep navy to light pink. I created a gradient from dark chocolate to a light cream.
From the window we used in #2, you can change the colors of both your dark and light color stops. Simply double click (remember, a single click brings up your midpoint slider) and select the tints. Just be sure to use a light hand here – colors that are within the same family work best and be sure to leave enough contrast between your lights and darks.
- Create a new brightness/contrast adjustment layer.
Often after tinting your image, you’ll find that your contrast is a bit lacking. This is easily fixed by adding a new layer: Layer > Adjustment Layer > Brightness/Contrast.
Adjust your sliders until you feel satisfied. For this image, I left the brightness alone, but increased the contrast by 24.
- Add a vignette.
One of the most characteristic things of old photographs is the presence of a vignette. The shadows around the edges add drama and flare, but are sometimes an overlooked detail.
Create a new layer: Command + Shift + N (on Mac). Select your blending mode as Hard Light and click the box to fill in with 50% gray.
Next, go to Filter > Correct Camera Distortion. This will bring up a new window, in which you won’t be able to see your image (don’t panic!). Move the slider bars to Amount: -50 and Midpoint: +30. This should create a soft and realistic vignette.
- Add some grain or noise.
Let’s be honest, vintage photos are never crystal clear and that’s one of the reasons why they’re so charming. With today’s cameras, the image quality is infinitely better so the grain must be manually added back in.
To do this, go to Filter > Noise > Add Noise. I chose to use uniform distribution and a monochromatic tone. It’s a relatively powerful filter, so I only needed just under 5% noise. You can adjust your slider bar to a place where the grain looks best on your particular image.
- You’re all done! Don’t forget to flatten your image and save!
Now you know how, in six easy steps, to give your photos a touch of the past. Play around with different tints to make truly unique versions of your modern photos. Thanks for reading and come back soon for another creative photo editing tutorial!


