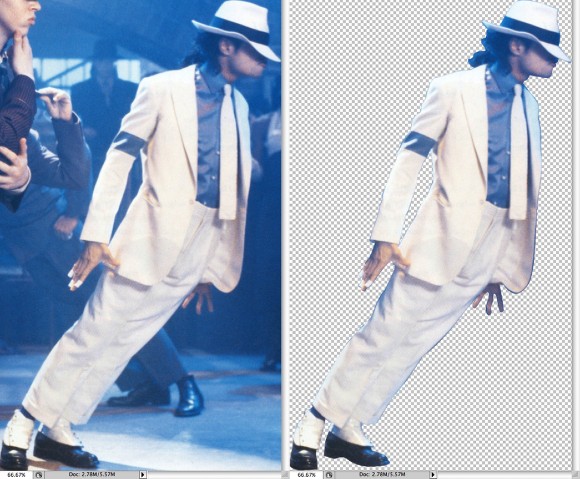
Using the Lasso Tool to remove an image background (before & after)
Let’s start with the most basic of all selection tools, The Lasso Tool. This is the most talked about and hated tool in the tool bar. But here are some easy tips to make it a little more easy to use.
1. First, why not make it more helpful in just knowing where the heck it is going to be selecting from. Go to Edit>Preferences>Cursors. There you will find the “Look” of tools. I like to have mine with Painting Cursors set to Normal Brush and Other Cursors set to Precise. Takes away the cute little icons and just give you the facts.
2. Using the Lasso tool and a mouse is like trying to make a fine art drawing where you can’t see the paper and you are using a brick to draw with. This is not a precise type of tool. If you can you should try to use a Stylus and Tablet or if you don’t have one these check out tip 3.
3. Using a mouse and the lasso tool can be done but don’t think that you have to get it right all in step. Smaller bites of a selection is an easier and even faster way of making a selection. Just click on the Add On icon at the Tool Menu Bar (Second set of boxes on the left. Looks like two overlapping boxes) or hold down the Shift Key. This will change the look of the cursor to one with a plus sign next to it. Now you can rest your hand between selections and if you make a mistake it is over a much smaller area so it will be easy to redo. Just start inside the selected area and move to the next area for selection. Bonus Tip…One nice thing about having the Lasso set for Add On is it is always set for adding to the selection. However if you hold down the Alt or Option key it will change to Subtract. Then you can remove parts of the selections that go too far. Release the Alt key and you are back to Add On.
There are two other Lasso tools hiding under the normal Lasso Tool:
One is the Magnetic Lasso tool. It looks like a lasso with (what else) a magnet next to it. This handy little tool can “see” the contrast between pixels and stick to the edges. It does have some draw backs. If you are working in a low contrast area it may not see the differences in pixels. But you are able to click with the mouse to set a point or holding spot of the selection.
The other is the Polygonal Lasso which I tend to use a lot. It makes straight lines of selections. To change directions or follow a curve just click the mouse to set a point. Works great for square objects and since I do a lot adjustments or repairs to my selections it really is fast for me.
The most important tip of the day: Save your selections!!!
I can’t tell how many times I have made a selection done the work and later had to make the same selection again. Saving selections is easy and only adds a fraction of bits or file size to any image. Once your selection is done and the marching ants are still active, go to Select>Save Selection. You will get a little menu pop up where you can name your selection (“Sky,” “Eyes,” “Dress,” “Red Car” or whatever makes sense to you) and click ok. Then if you need to reuse the selection go to Select>Load Selection. There, from the drop down menu, you will find the name of your selection which is just one click away. You can even load them as an inverse selection. So say you selected the sky and now want to have the land or foreground selected. Just pick the sky selection and invert. Bingo! The land is now selected. All of these selections are saved in the Channels Pallets.
So there you have it. Have fun!
Need more help in mastering these tools? Check out one of our upcoming Adobe Photoshop courses!

